
Meters and their settings
To add meters, you must first have objects and rental spaces added.
Meters can be added manually one by one or all at once via Excel import.
First of all:
- Open the "Objects" module and select the building where you want to add meters.
- Select the "Meters" tab from the top menu.
TO ADD METERS MANUALLY:
- Click "Add New" in the top right corner.
- Select the meter type. You can create new types to differentiate between different meters.
- Assign a name and initial reading to the meter.
NB! When naming the meter, we recommend using room names instead of tenant names. Using tenant names may cause confusion when tenants change.
- In the coefficient field, enter a number if the meter reading needs to be multiplied by a factor. Example: If you record electricity readings in Wh but want to display kWh, set the coefficient to 0,001.
- The External ID field is used when integrating with remotely readable meters.
- In the Related meter field, assign a parent meter if the new meter is a sub-meter. After saving, the meters will display as a "stair-step" hierarchy where sub-meter readings are subtracted from the main meter.

- Under Category, specify whether the meter is:
- Main meter – assigned to a single rental space.
- Shared meter – consumption is divided among multiple rental spaces.
- In the "Related to room" field, assign the meter to a room to determine who is responsible for its consumption and payment. Click "Save".
NB! If a tenant changes, the new tenant is automatically linked to the meter.
TO ADD METERS VIA EXCEL IMPORT:
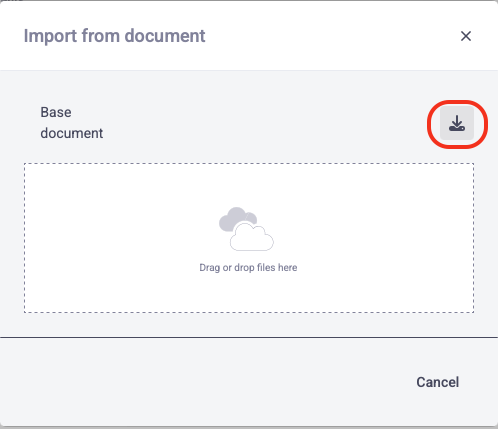
- Click the "..." button in the top right corner and select "Import from document".
- Download the template file.
- Open the template file on your computer and fill in the fields according to the given example:
- Column A – Meter Name
- Column B – Specify whether it is a Main Meter or Shared Meter (Use only values from row 4!)
- Column C – Specify the Meter Type (Use only values from row 5!)
- Column D – Initial Reading
- Column E – Coefficient
- Save the file and upload it to the import window in Hausing.
- Refresh the page to view the added meters.
- Assign the meters to the correct rental spaces and make any necessary adjustments:
- Click on the meter and select "Edit".
- In the "Related to room" field, assign the meter to a specific room to determine who is responsible for consumption and payment.
- Click "Save".