
How to create tenant/apartment owner users (customers who use work orders)
Users can be created in both the System users and Contacts menus.
Creating a user in the System users menu
1. CREATE THE USER
- Open System users
- Click Add new
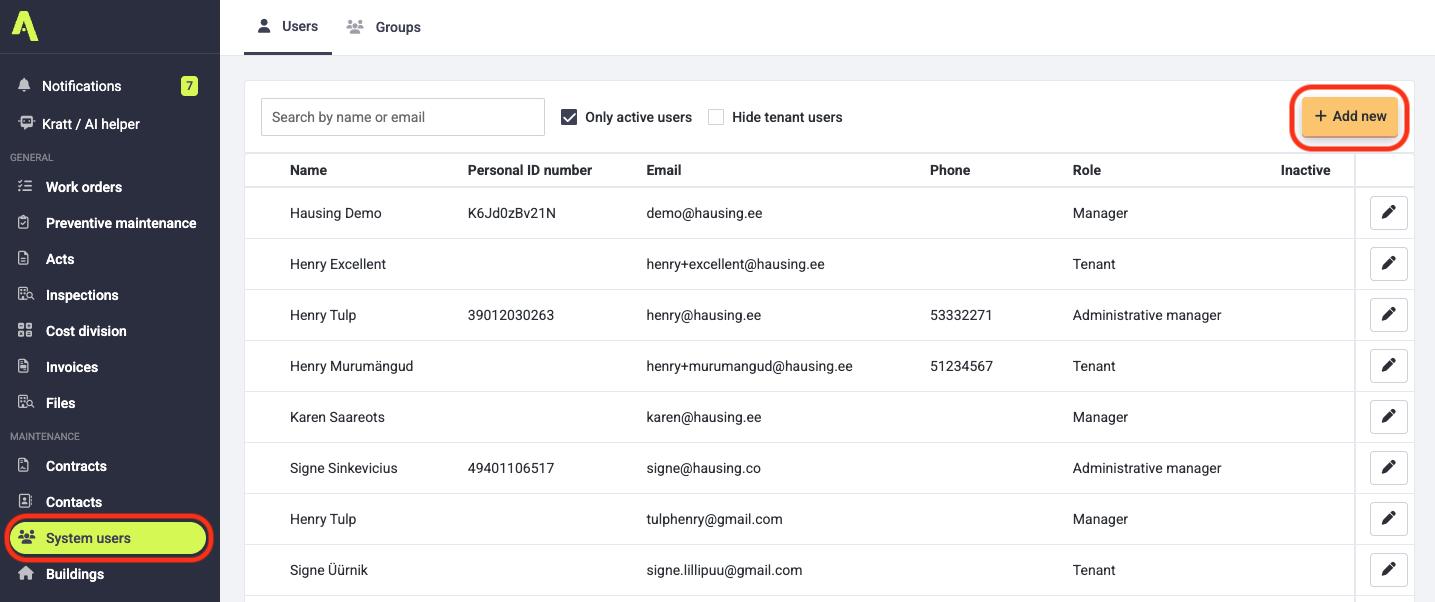
- Select Tenant
- Enter the name, email and language
- Select the building and room
- To add another room, click + Add another room/flat
- Click Save
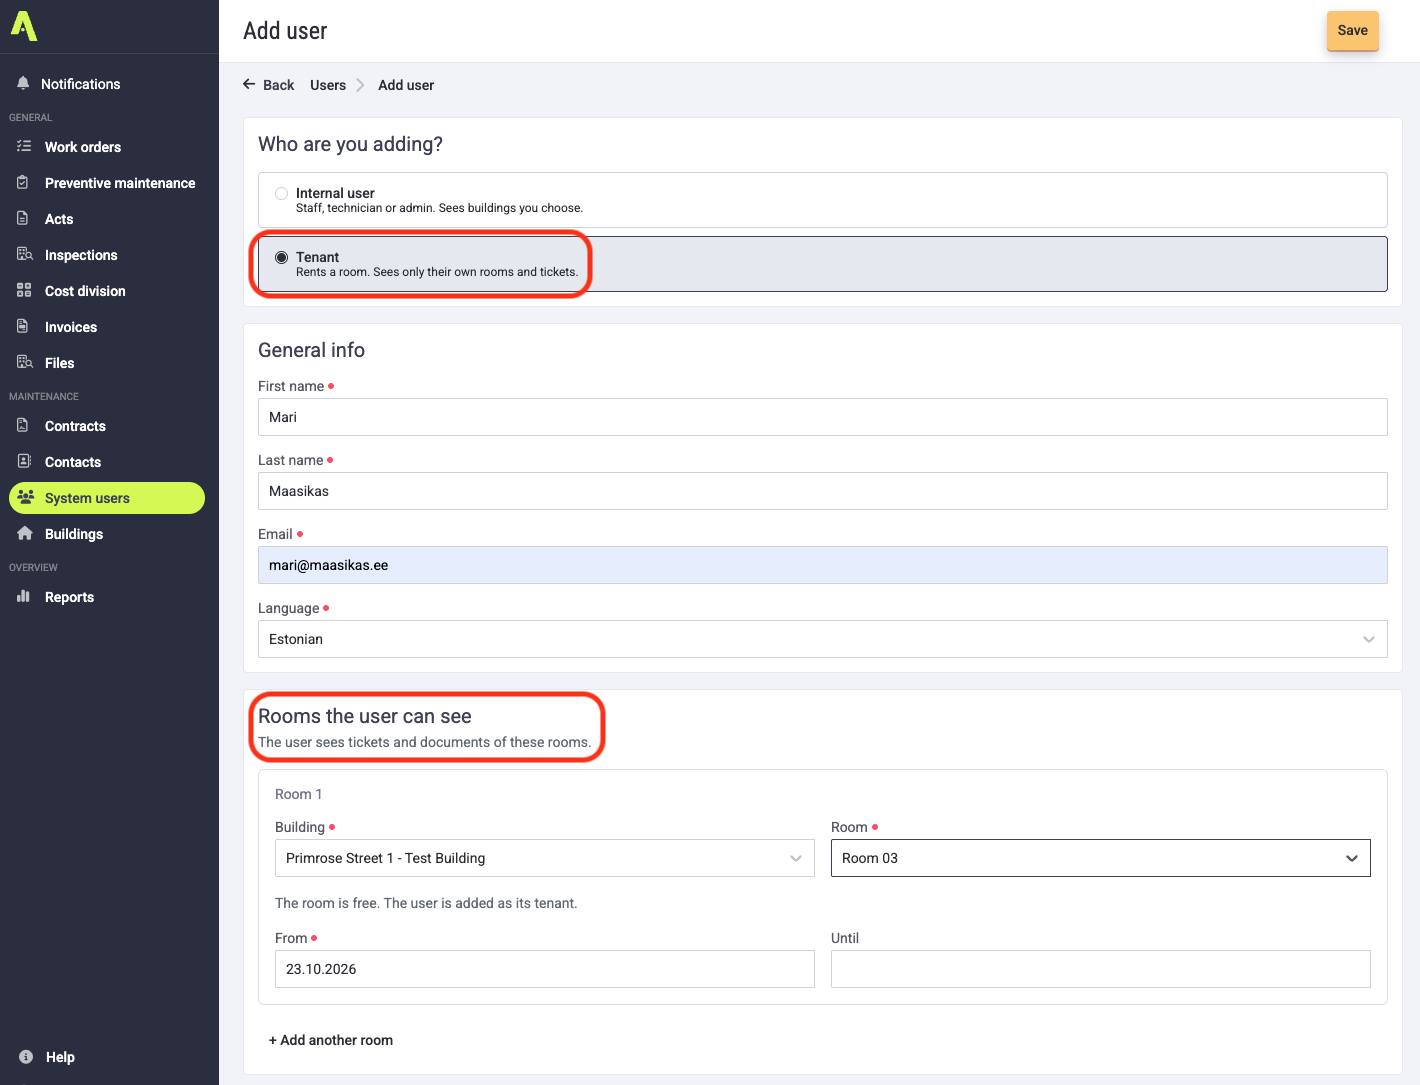
An invitation is sent automatically and is valid for 7 days.
2. IF THE ROOM ALREADY HAS A TENANT/OWNER
After you select a room, the form shows who is currently connected to it.
- Room is empty: enter the start date and, if needed, an end date. Leave the end date empty for no end date.
- Room has a tenant/owner with no end date: the new user joins their household and sees the same work orders and documents.
- Room has a tenant/owner with an end date: choose whether the new user joins the household until the end date, or starts a new connection from the day after it ends.
- Room has an upcoming tenant/owner: the new user joins them and sees the room from the start date.
3. ADD OR REMOVE ROOMS
- Open System users and open the user from the pencil icon
- To add: click + Add room/flat, select the building and room and save
- To remove one person: click Remove from this room/flat and confirm. Other household members keep their access.
- To end the whole household: set an end date on the room in Contacts → Open contact → Rooms
Creating a user in the Contacts menu
1. CREATE THE USER
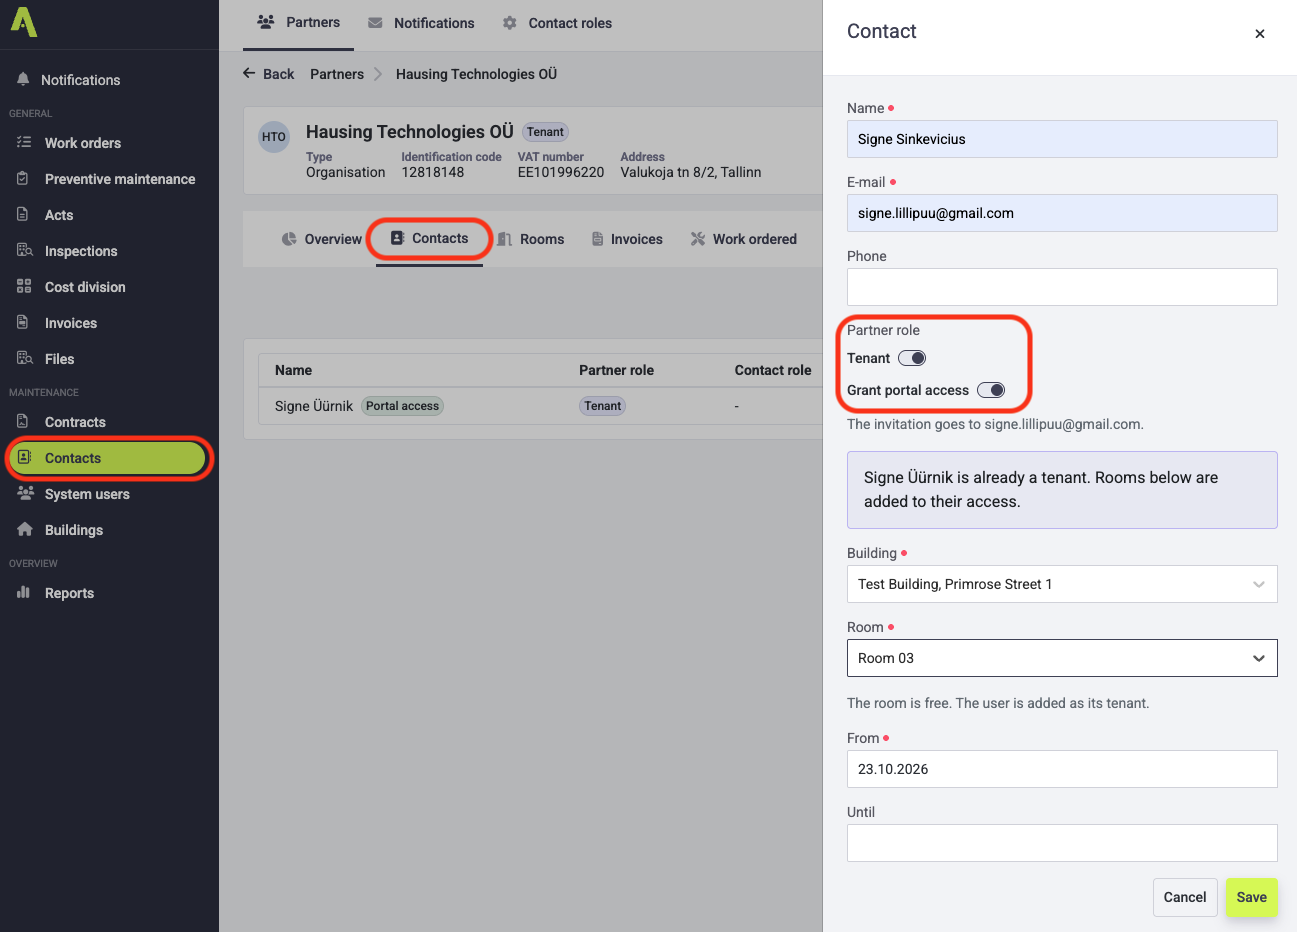
- Open Contacts and click on the tenant you want to add a user for
- Select Contact persons and Add new
- Fill in the details and turn on Tenant and Grant portal access
- Select the building, room/flat and the start date of the connection
- Click Save
2. ADD OR REMOVE ROOMS
- Open Contacts and click on the contact
- Select Rooms and Add new
- Add the room, select the persons connected to it and save
- To remove one person: select Contact persons, click on the contact and select Revoke portal access
- To end the whole household: select Rooms → Edit → Set an end date and save
Tip: While the user hasn’t accepted the invitation, you can resend it from their user page in the System users menu (open the user from the pencil icon) with Resend invitation. Unactivated accounts have a red exclamation mark next to them.
Tip: New rooms appear for the user after they log out and log back in or refresh the page.