
How to use inspections?
Inspections is a paid add-on module. To activate it, please write to help@hausing.ee
Templates are used to conduct inspections, and a work order can be created in the Work Orders module from each inspection question. An act can be generated from the inspection, which all parties can sign digitally or with a finger.
To use Inspections, you must first create an inspection template. To generate acts, you also need to create an act template.
1. CREATING AN INSPECTION TEMPLATE
- Go to Inspections > Inspection templates > Add new template
- Add a title and description to the template, and optionally an attachment (for example a building plan)
- Under General data you can add questions that do not need to generate a work order after the inspection. For example, when handing over a unit you can record meter readings, number of keys handed over, etc.
- Inspection questions can be categorised. To add a category, click "+ add category". For example, in an apartment warranty end inspection you can keep questions related to the electrical system, interior finishes, and appliances in separate categories.
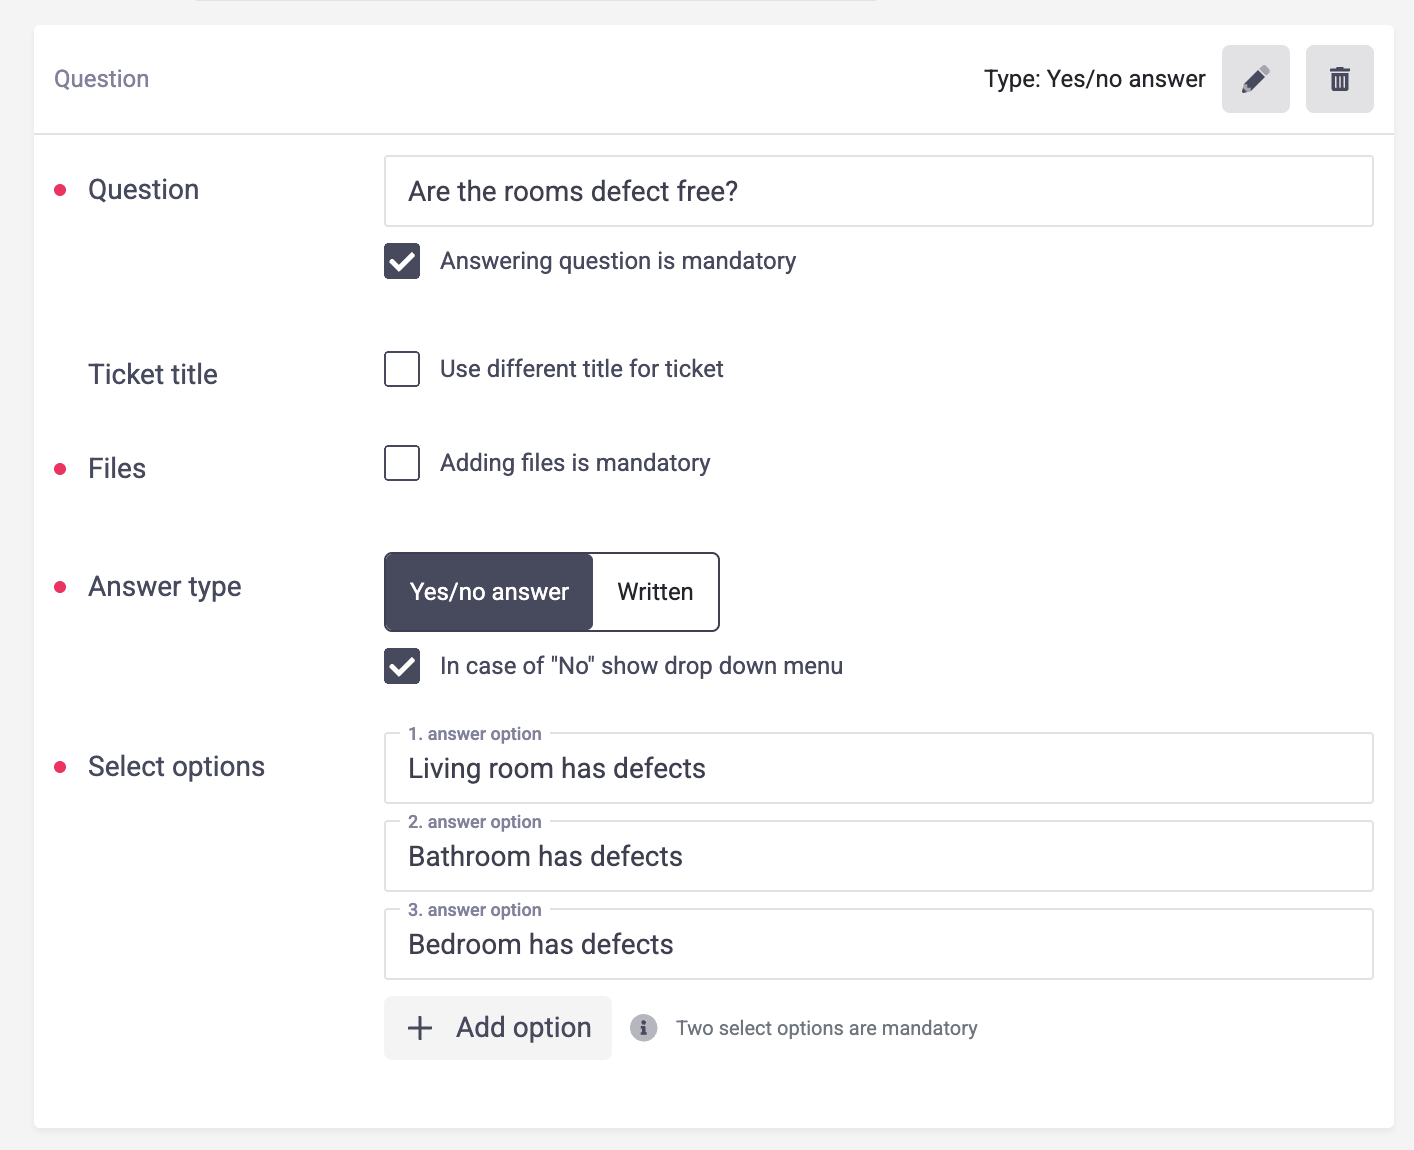
- Under each category you can start adding inspection questions using "+ add question". Define:
- The question title
- Whether answering the question is mandatory
- If a work order is created from the question, whether the work order title should match the question title or be defined separately
- Whether file attachments are mandatory
- Whether the answer type is written or yes/no
- If you mark that a dropdown appears on "No", you can define different answer options there. See example in the image below.
- Once the template is ready, click Save.
2. CREATING AN ACT TEMPLATE
- In the Inspections menu, select Act templates from the top bar > Add new template
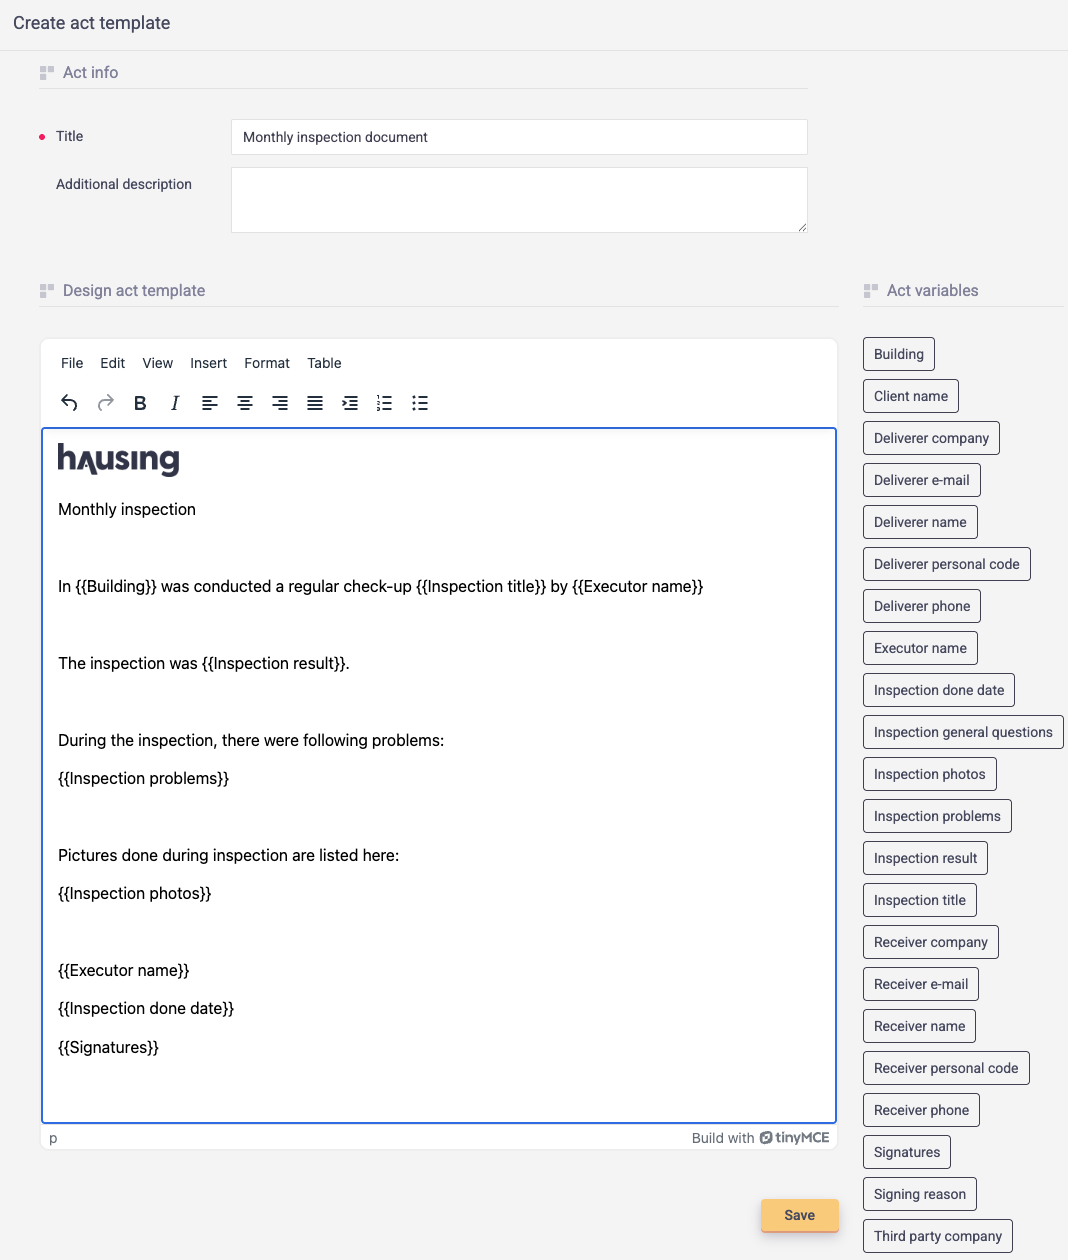
- Set a title and description for the template and compose the document to suit your needs.
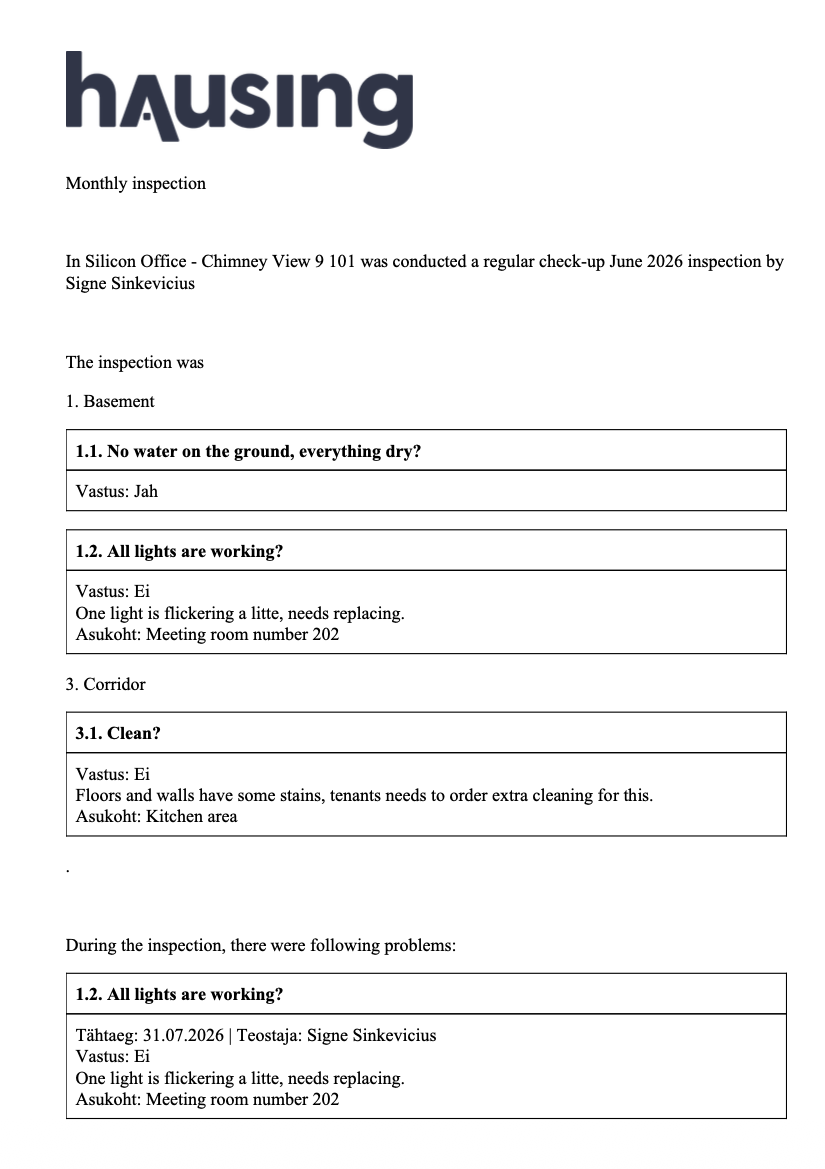
- On the right side of the template you will find act variables - fields you can use to insert lines that the system fills in automatically. To add a variable, click the position in the document where the variable should appear, then click the variable. See example images of an act template and a completed act after finishing an inspection:
3. CONDUCTING AN INSPECTION
- In the Inspections menu, click "+ Add inspection", set the inspection name, building, and optionally a room.
- Select which inspection template to use (you can create multiple templates)
- Define whether an act should be generated from the inspection - if yes, select which act template to use, then click Save.
- First, fill in the contact details of the inspection parties. Add a third party if needed.
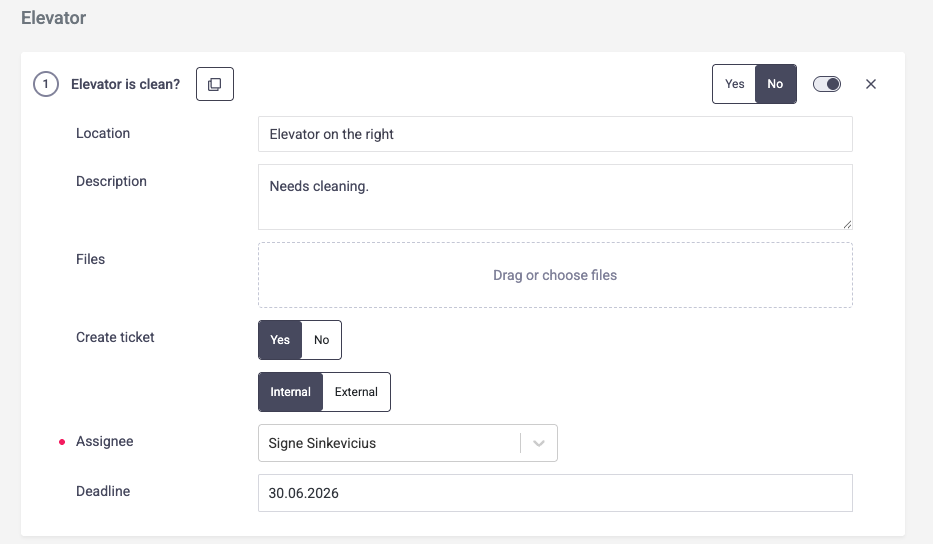
- You can then proceed to fill in the inspection. Each question can be copied (button after the question) or toggled on or off as part of the inspection (on/off button on the right edge).

- When you answer "No" to a question, it means you want to add further details, and a detail view opens immediately where you can define whether a work order should be created, add clarifications, and assign the work order directly to an external or internal executor.
- To finish the inspection, choose:
- Save - the inspection is saved as a draft and remains unfinished.
- Save and finish - the inspection is completed. If selected, an act is generated which can be signed. If no act was chosen, the inspection is complete and signing without an act is not possible.
- If you created an act, you will see it after finishing the inspection and can download it. To sign the act, click "Sign act" and choose whether to sign with a finger or digitally. Sign separately for each contact person. For digital signing, choose whether to sign directly in Hausing or send signing invitations by email.
- In the Inspections menu you can see whether an inspection is in progress, finished, or signed.